At the beginning of the year, I was working through a set of designs for a sample band and I thought you might like to see the way I use Tablet Weaving Draft Designer during my design process. For large drafts like this one I work a bit differently to the way I do for smaller drafts, as I find that otherwise I get lost in them (thanks, dyslexia!). To reduce the amount of visual noise, I focus on the pattern of backward turns against forward turns rather than the colour and direction of the threads. For smaller drafts like the ones in my two books Warp-Twined Angles and Vacant-Hole Pinwheels, I turn the backward turn saturation to zero and work with the flow of the threads in the boxes instead.
I wove these drafts as 2x2 diagonals, but I designed them in 1x3 diagonals, as the turning sequence will be the same and it results in a pencil sketch that's easier for me to read.
Step 1
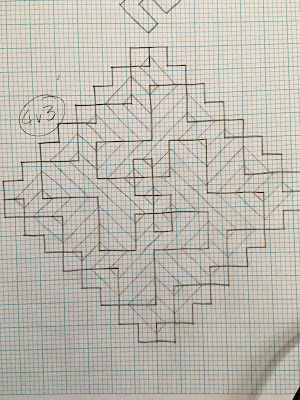
Draw out the motif. I use metric graph paper as my standard "thinking paper" as I can fit quite a few designs on the same sheet.
Step 2
Draw 4x4 zigzags around the motif and draw in all the vertical and horizontal mirror lines.
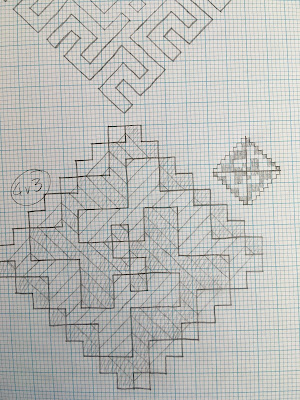
Shade in all the areas that contain left leaning lines (these will be the backward turns in the final draft).
Step 4
Draw a simplified schematic of the shaded motif, where each square in the schematic is equivalent to a 4x4 square in the motif. Add vertical and horizontal mirror lines down the middle of the schematic.
Step 5
Turn off the threads in the display section of the control panel of TDD and set the rulers to the same position as the mirror lines in the schematic. Open the previous draft from the batch and alter the dark and light squares to match the new schematic. I also reduce the visual scale until I can see the whole draft on my screen at once. The 4x4 squares at each corner of the draft will produce the filler between the motifs.
Step 6
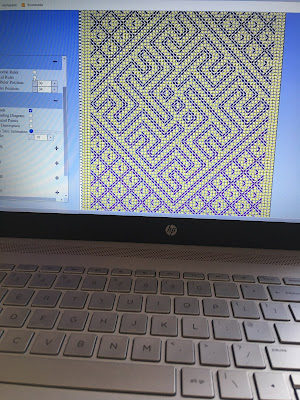
Turn the threads back on, the rulers off, and the backward turn saturation down to zero and check that the motif looks the same as the pencil sketch motif.
The final draft with both the threads and backward turn shading in place, ready to weave. I do this straight from TDD without printing anything out, as I can use the horizontal ruler tool to help me keep my place.
For this band I used yellow onion dyed yarn and purple/almost black logwood dyed yarn from the stash I've been dyeing for over the last few years. I'm hoping to play with some indigo this summer to get purples from my red brazilwood yarn and greens from my yellow weld and onion skin yarns.


